前言
很久之前我写过一篇介绍使用 Nginx-Ingress 实现蓝绿部署和金丝雀发布的文章,但那篇文章只是介绍了 nginx-ingress 具备这些能力,真正应用还要很多额外的配置和操作,况且现在能实现这些功能的并不只有 nginx-ingress,Service Mesh 工具如:Istio,App Mesh,Linkerd;Ingress Controller 如:Contour,Gloo,NGINX 都能实现,而我们需要的更多是进行金丝雀发布之后指标的监控,流量的调整以及出现问题后的及时回滚。而 Flagger 就是这样一个帮助我们解决上面这些问题的开源工具。
Flagger
Flagger 是一种渐进式交付工具,可自动控制 Kubernetes 上应用程序的发布过程。通过指标监控和运行一致性测试,将流量逐渐切换到新版本,降低在生产环境中发布新软件版本导致的风险。
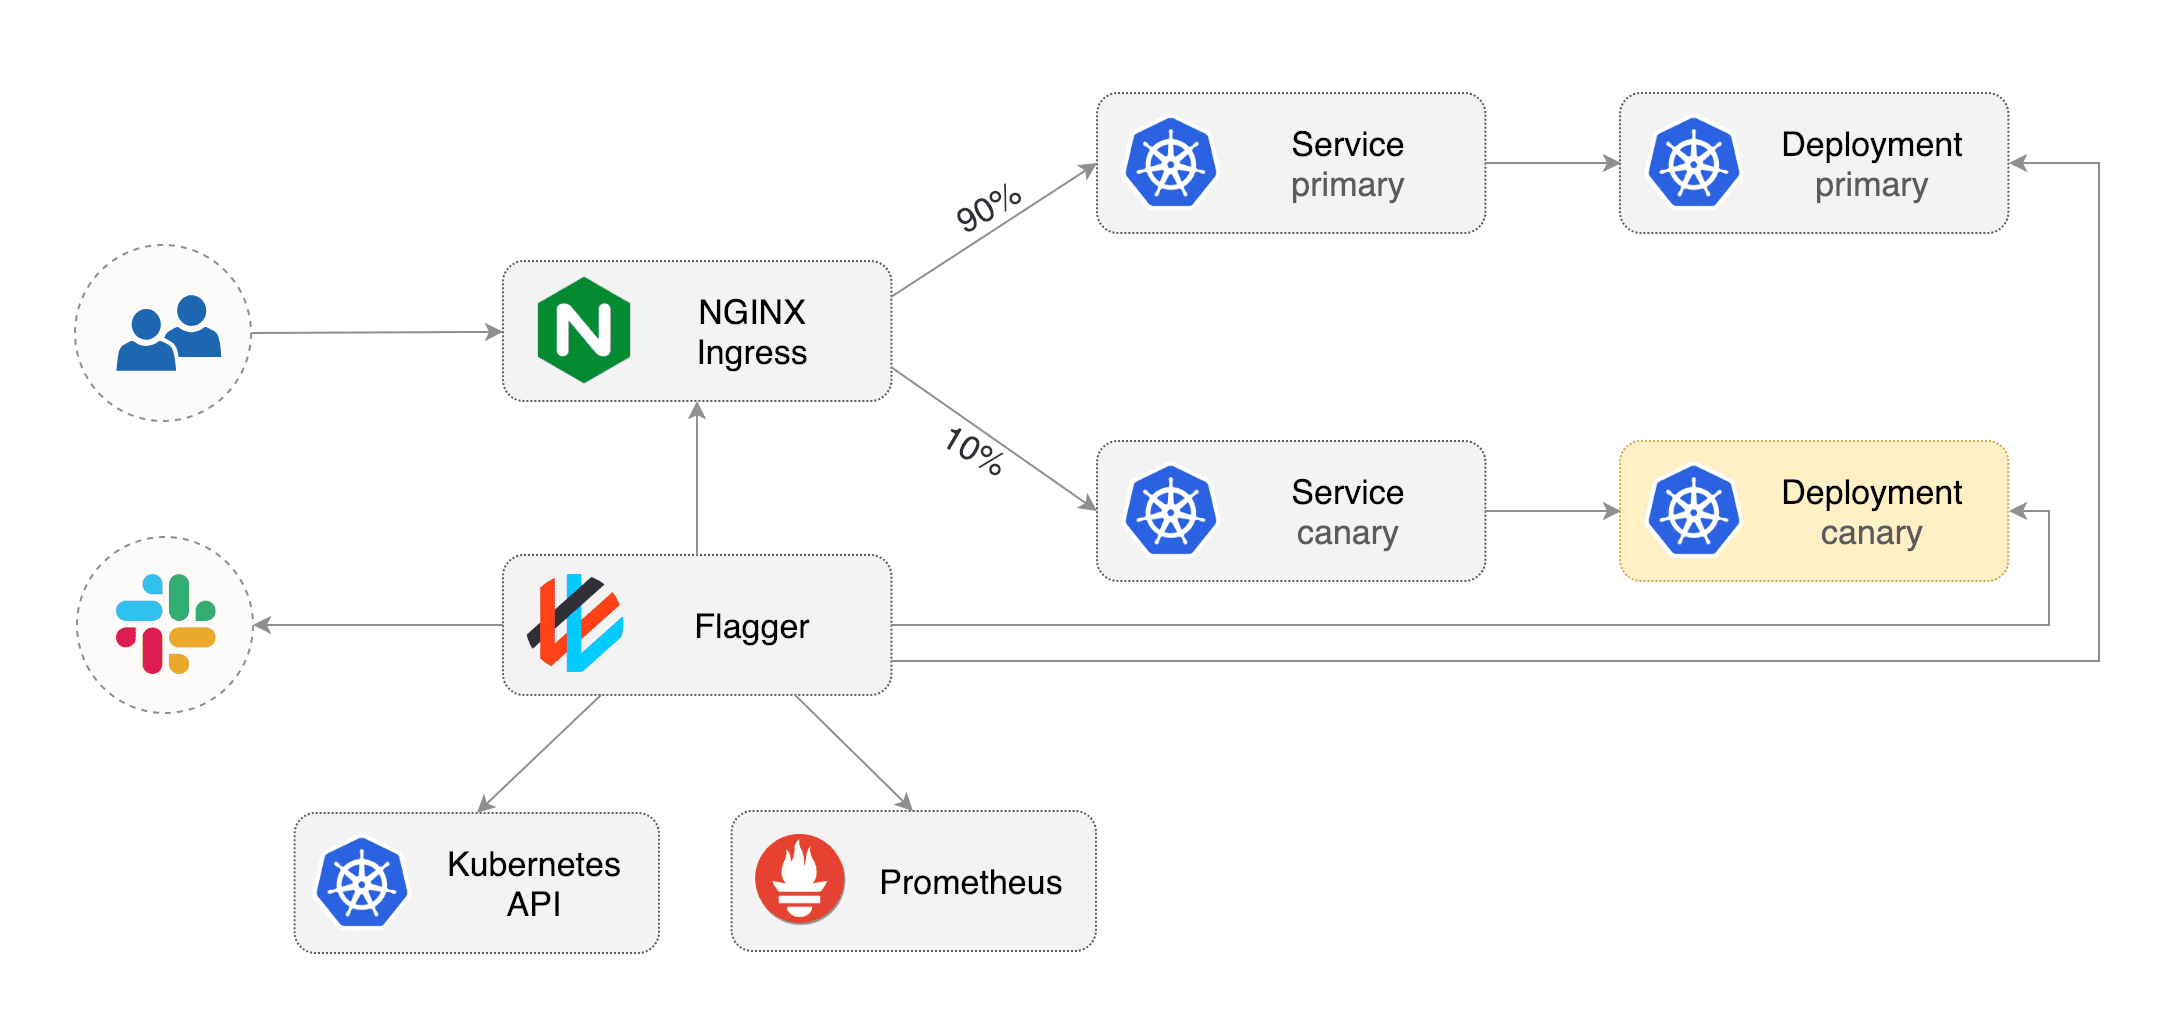
Flagger 使用 Service Mesh(App Mesh,Istio,Linkerd)或 Ingress Controller(Contour,Gloo,NGINX)来实现多种部署策略(金丝雀发布,A/B 测试,蓝绿发布)。对于发布分析,Flagger 可以查询 Prometheus、Datadog 或 CloudWatch,并使用 Slack、MS Teams、Discord 和 Rocket 来发出告警通知。
本文主要介绍 Flagger 使用 Nginx-Ingress 进行金丝雀发布并监控发布状态,更多内容见官方文档。
前提条件
版本要求
安装 Flagger 需要 Kubernetes 版本高于 v1.14,NGINX ingress 版本高于 0.24。
安装 NGINX ingress
1
2
3
4
5
6
| $ kubectl create ns ingress-nginx
$ helm upgrade -i nginx-ingress stable/nginx-ingress \
--namespace ingress-nginx \
--set controller.metrics.enabled=true \
--set controller.podAnnotations."prometheus\.io/scrape"=true \
--set controller.podAnnotations."prometheus\.io/port"=10254
|
安装部署
Flagger 安装
Flagger 提供了 Hlem 和 Kustomize 两种安装方式,这里使用 Helm 3 安装:
1
2
3
4
5
6
7
8
| $ helm repo add flagger https://flagger.app
$ helm upgrade -i flagger flagger/flagger \
--namespace ingress-nginx \
--set prometheus.install=true \
--set meshProvider=nginx \
--set slack.url=https://hooks.slack.com/services/YOUR/SLACK/WEBHOOK \
--set slack.channel=flagger \
--set slack.user=flagger
|
值得注意的是这里我选择了 Slack 作为通知软件,需要在自己的 #channel 内新增一个 APP,并将该 APP 的 url、channel、user 填入上面的命令中。这里设置的是全局通知,集群中的 Flagger 被触发后都会进行通知,当然也可以为单个 Flagger 配置专门的通知,这里就不做过多介绍,详情见官方文档。
示例安装
新建测试 namespace:
1
| $ kubectl create ns test
|
部署示例 deployment 和 horizontal pod autoscaler:
1
| $ kubectl apply -k github.com/weaveworks/flagger//kustomize/podinfo
|
部署负载测试器,以便在金丝雀发布时进行流量分析:
1
| $ helm upgrade -i flagger-loadtester flagger/loadtester --namespace=test
|
部署 ingress,这里的 app.example.com 需要改成你自己的域名,如果是在本地进行测试,则修改本机和负载测试器所在节点的 /ect/hosts,将其指向你的 ADDRESS,否则将无法进行流量分析,导致部署失败。
 1
 2
 3
 4
 5
 6
 7
 8
 9
10
11
12
13
14
15
16
17
| apiVersion: networking.k8s.io/v1beta1
kind: Ingress
metadata:
name: podinfo
namespace: test
labels:
app: podinfo
annotations:
kubernetes.io/ingress.class: "nginx"
spec:
rules:
- host: app.example.com
http:
paths:
- backend:
serviceName: podinfo
servicePort: 80
|
将以上内容另存为 podinfo-ingress.yaml,然后应用:
1
| $ kubectl apply -f ./podinfo-ingress.yaml
|
创建一个 Canary 资源:
 1
 2
 3
 4
 5
 6
 7
 8
 9
10
11
12
13
14
15
16
17
18
19
20
21
22
23
24
25
26
27
28
29
30
31
32
33
34
35
36
37
38
39
40
41
42
43
44
45
46
47
48
49
50
51
52
53
54
55
56
57
58
59
60
61
62
63
| apiVersion: flagger.app/v1beta1
kind: Canary
metadata:
name: podinfo
namespace: test
spec:
provider: nginx
# deployment reference
targetRef:
apiVersion: apps/v1
kind: Deployment
name: podinfo
# ingress reference
ingressRef:
apiVersion: networking.k8s.io/v1beta1
kind: Ingress
name: podinfo
# HPA reference (optional)
autoscalerRef:
apiVersion: autoscaling/v2beta1
kind: HorizontalPodAutoscaler
name: podinfo
# the maximum time in seconds for the canary deployment
# to make progress before it is rollback (default 600s)
progressDeadlineSeconds: 60
service:
# ClusterIP port number
port: 80
# container port number or name
targetPort: 9898
analysis:
# 时间间隔 (默认 60s)
interval: 10s
# 回滚前的最大失败指标检查次数
threshold: 10
# 路由到金丝雀副本的最大流量百分比
# 百分比 (0-100)
maxWeight: 50
# 金丝雀每次递增的百分比
# 百分比 (0-100)
stepWeight: 5
# NGINX Prometheus checks
metrics:
- name: request-success-rate
# minimum req success rate (non 5xx responses)
# percentage (0-100)
thresholdRange:
min: 99
interval: 1m
# testing (optional)
webhooks:
- name: acceptance-test
type: pre-rollout
url: http://flagger-loadtester.test/
timeout: 30s
metadata:
type: bash
cmd: "curl -sd 'test' http://podinfo-canary/token | grep token"
- name: load-test
url: http://flagger-loadtester.test/
timeout: 5s
metadata:
cmd: "hey -z 1m -q 10 -c 2 http://app.example.com/"
|
将以上内容另存为 podinfo-canary.yaml,然后应用:
1
| $ kubectl apply -f ./podinfo-canary.yaml
|
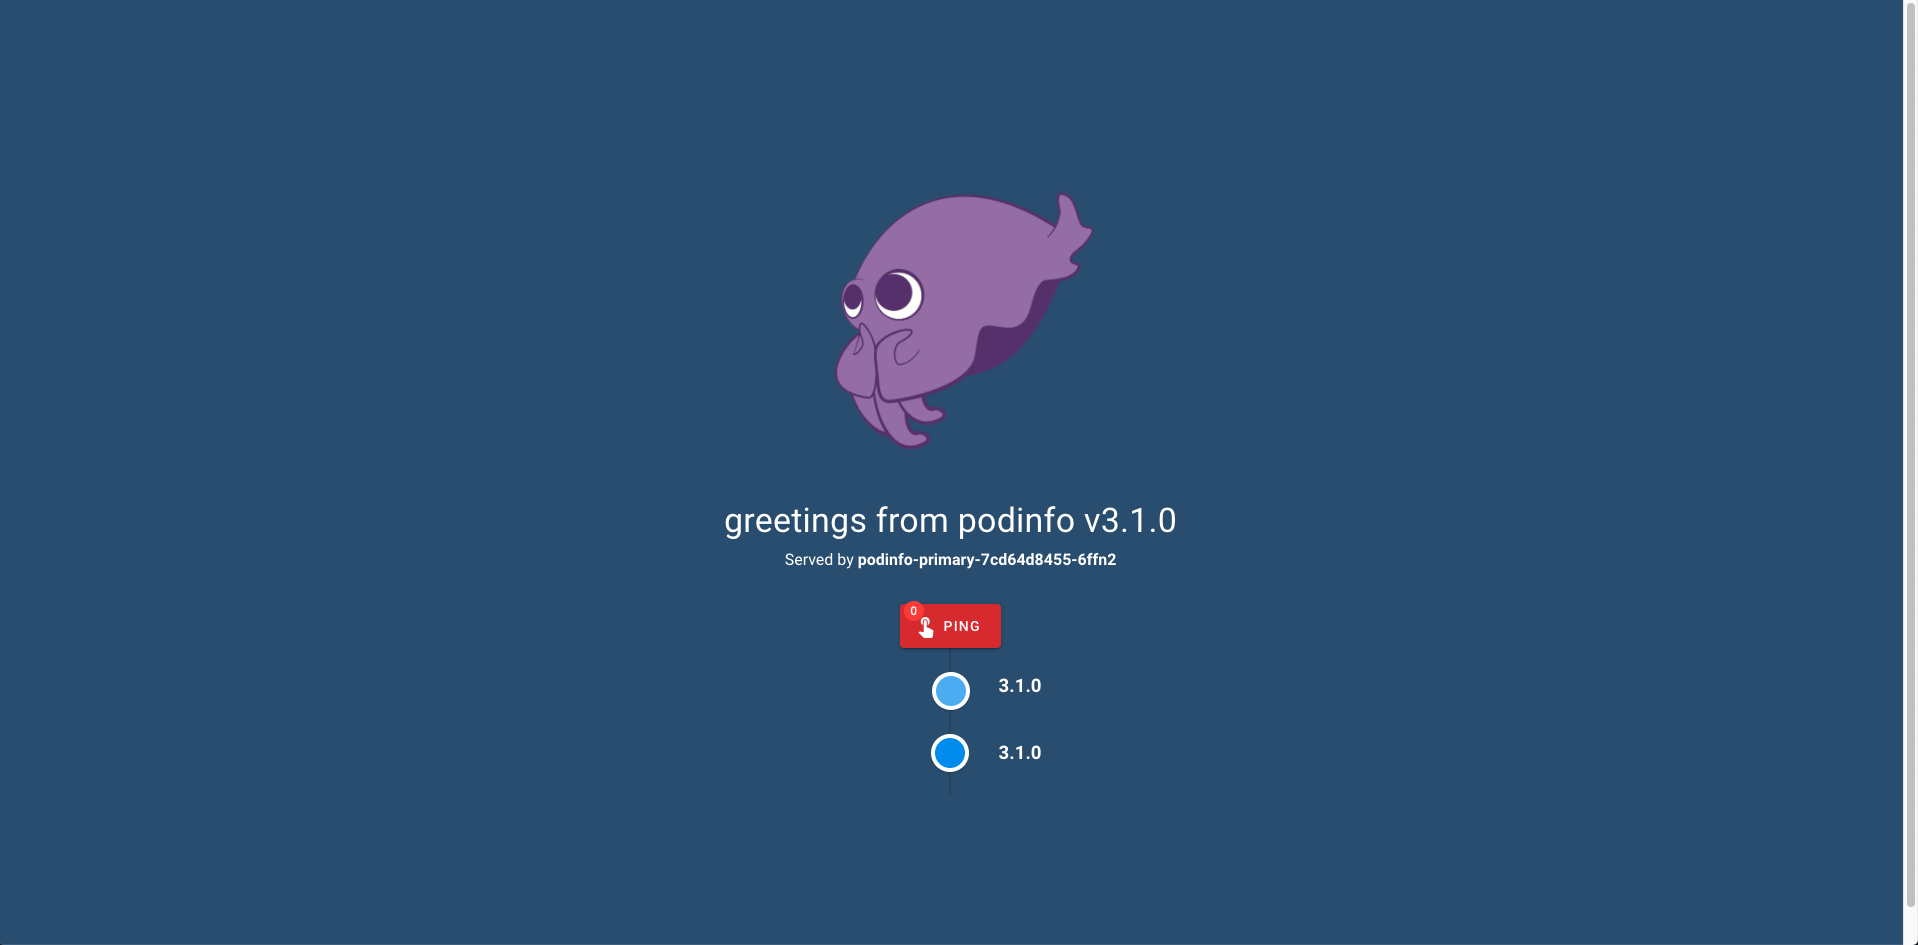
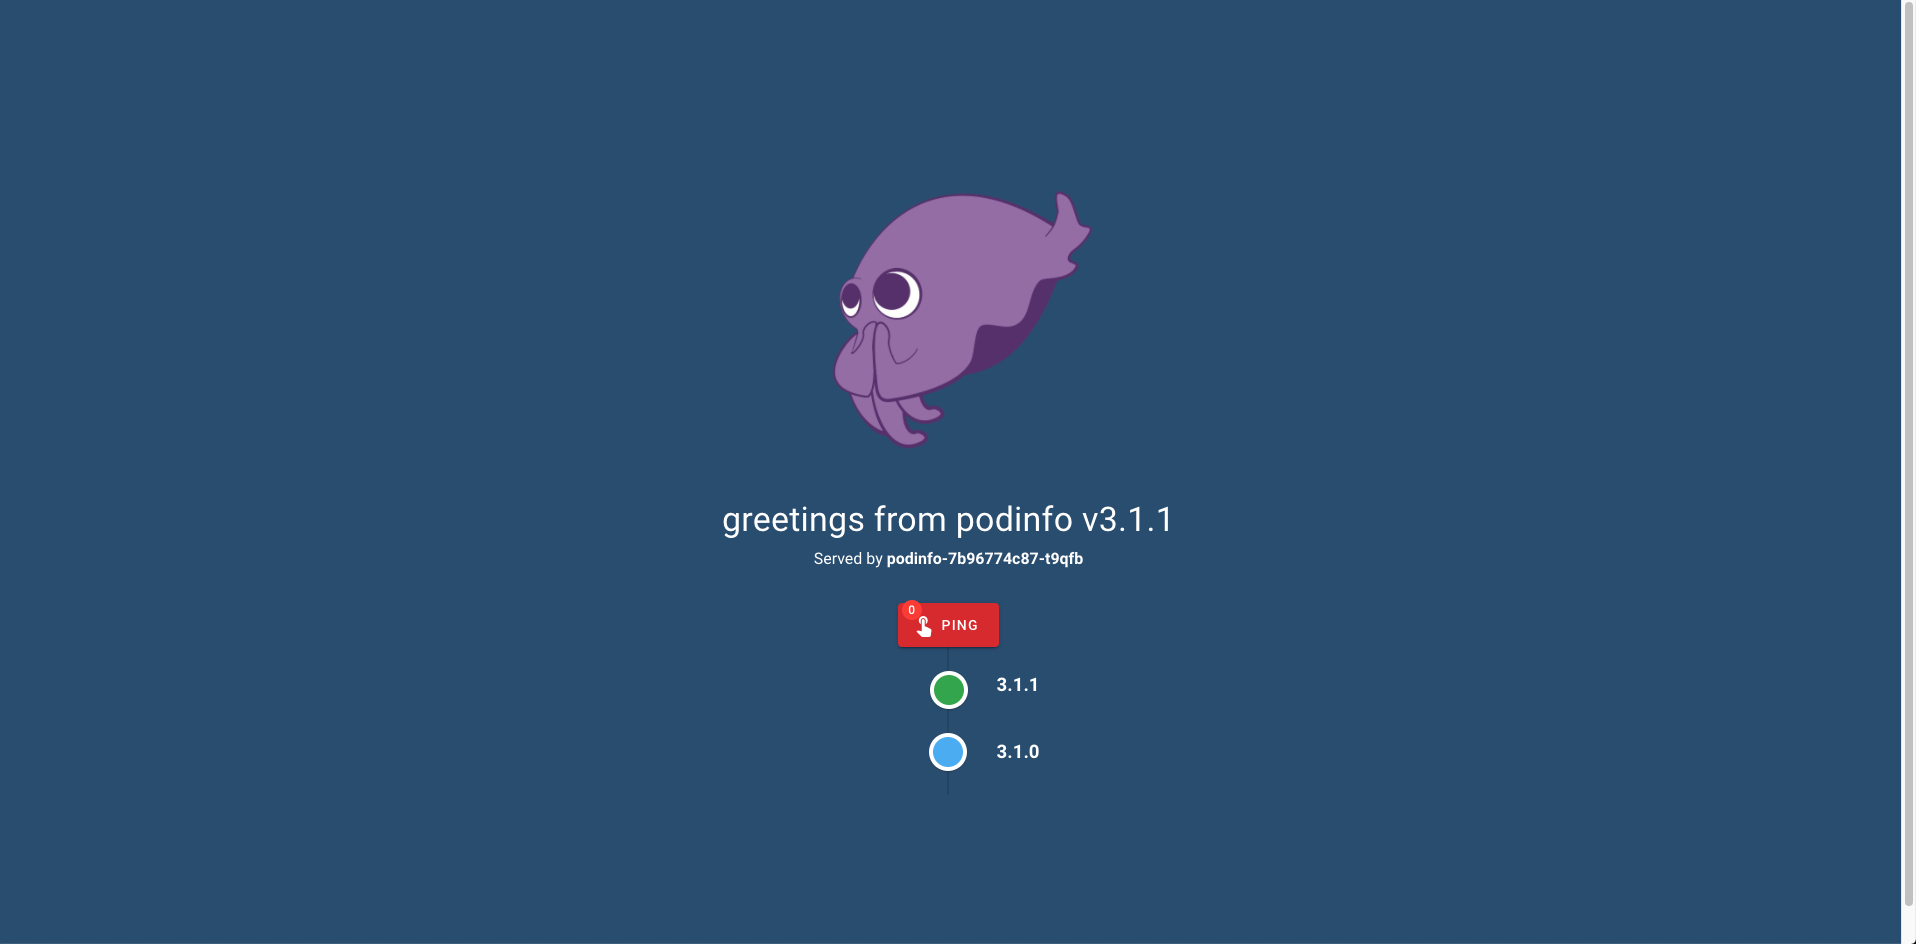
目前可以看到示例应用 podinfo 已经安装完毕,并出现了 podinfo 和 podinfo-primary 两个版本,并且 http://app.example.com/ 已经可以访问:
 1
 2
 3
 4
 5
 6
 7
 8
 9
10
11
12
13
14
15
| $ kubectl get deploy,svc,ing -n test
NAME READY UP-TO-DATE AVAILABLE AGE
deployment.apps/flagger-loadtester 1/1 1 1 29h
deployment.apps/podinfo 0/0 0 0 29h
deployment.apps/podinfo-primary 2/2 2 2 29s
NAME TYPE CLUSTER-IP EXTERNAL-IP PORT(S) AGE
service/flagger-loadtester ClusterIP 10.43.116.74 <none> 80/TCP 29h
service/podinfo ClusterIP 10.43.155.193 <none> 80/TCP 9s
service/podinfo-canary ClusterIP 10.43.194.226 <none> 80/TCP 29s
service/podinfo-primary ClusterIP 10.43.254.13 <none> 80/TCP 29s
NAME HOSTS ADDRESS PORTS AGE
ingress.extensions/podinfo app.example.com 192.168.1.129,192.168.4.210 80 5h17m
ingress.extensions/podinfo-canary app.example.com 80 9s
|
这个页面会展示 podinfo 的版本已经其正在访问的 pod 名称:
自动金丝雀发布
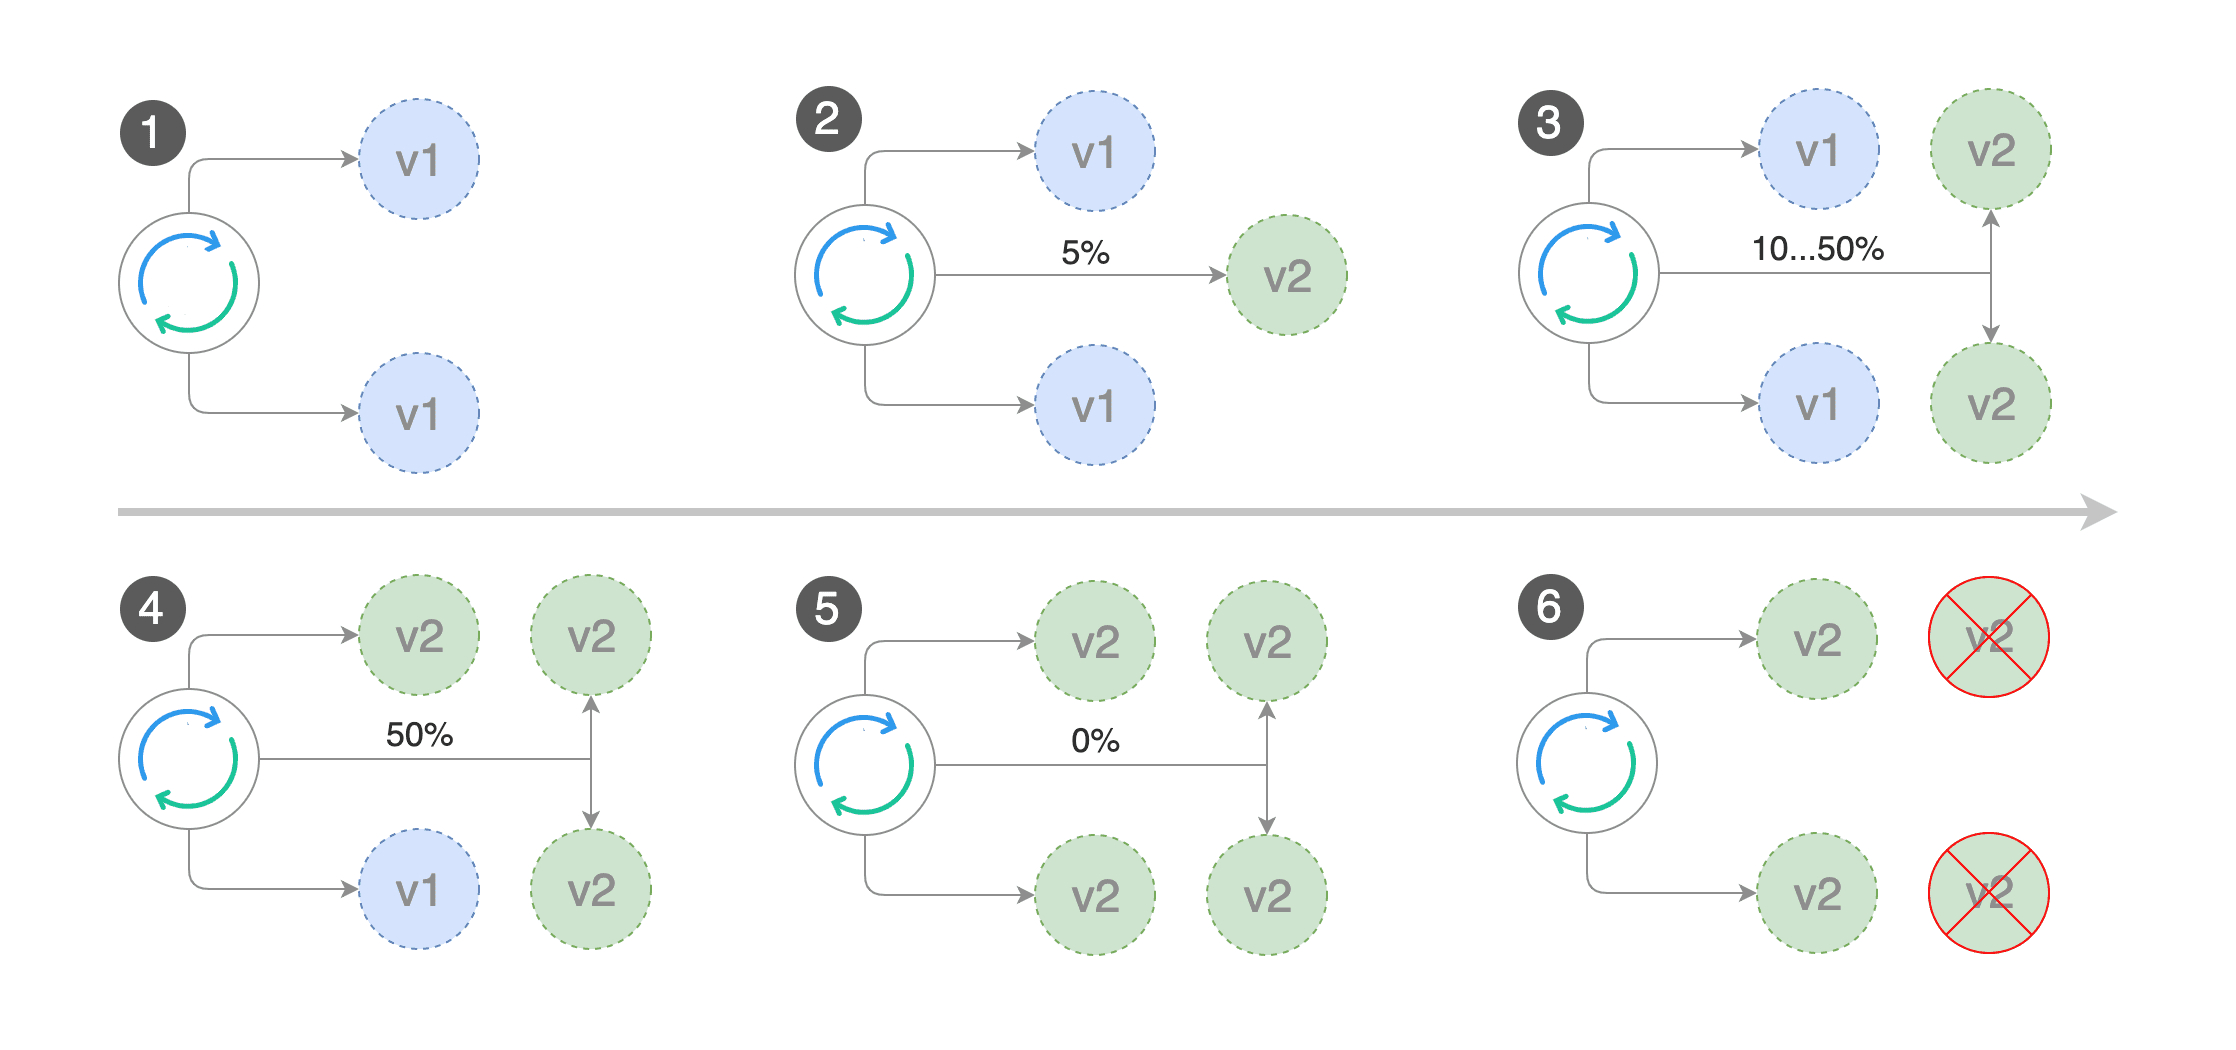
现在起发布由 Flagger 控制,在部署新版本后,Flagger 自动将流量按照比例切换到新版本上,同时监控性能指标,例如 HTTP 请求的成功率、请求的平均持续时间和 pod 运行状态,经过分析后提升流量或者回滚,并通知到 Slack。
通过更新镜像版本触发金丝雀部署:
1
2
| $ kubectl -n test set image deployment/podinfo podinfod=stefanprodan/podinfo:3.1.1
deployment.apps/podinfo image updated
|
可以看到初始化完成后已经有 5% 的流量切换到新版本了
 1
 2
 3
 4
 5
 6
 7
 8
 9
10
11
12
13
14
15
16
17
18
19
20
21
22
23
24
25
26
27
28
29
30
31
| $ kubectl -n test describe canary/podinfo
...
Status:
Canary Weight: 5
Conditions:
Last Transition Time: 2020-07-02T07:21:26Z
Last Update Time: 2020-07-02T07:21:26Z
Message: New revision detected, progressing canary analysis.
Reason: Progressing
Status: Unknown
Type: Promoted
Failed Checks: 0
Iterations: 0
Last Applied Spec: c8bdf98d5
Last Transition Time: 2020-07-02T07:22:05Z
Phase: Progressing
Tracked Configs:
Events:
Type Reason Age From Message
---- ------ ---- ---- -------
Warning Synced 10m flagger podinfo-primary.test not ready: waiting for rollout to finish: observed deployment generation less then desired generation
Warning Synced 10m flagger podinfo-primary.test not ready: waiting for rollout to finish: 0 of 2 updated replicas are available
Normal Synced 10m (x3 over 10m) flagger all the metrics providers are available!
Normal Synced 10m flagger Initialization done! podinfo.test
Normal Synced 41s flagger New revision detected! Scaling up podinfo.test
Warning Synced 31s flagger canary deployment podinfo.test not ready: waiting for rollout to finish: 0 of 1 updated replicas are available
Warning Synced 21s flagger canary deployment podinfo.test not ready: waiting for rollout to finish: 0 of 2 updated replicas are available
Warning Synced 11s flagger canary deployment podinfo.test not ready: waiting for rollout to finish: 1 of 2 updated replicas are available
Normal Synced 1s flagger Starting canary analysis for podinfo.test
Normal Synced 1s flagger Pre-rollout check acceptance-test passed
Normal Synced 1s flagger Advance podinfo.test canary weight 5
|
使用 watch 也能实时看到部署流量的权重,根据上面的设置,新版本权重大于 50% 就认为部署成功,流量将全部切换到新版本,并完成金丝雀部署:
1
2
3
4
5
| $ watch kubectl get canaries --all-namespaces
Every 2.0s: kubectl get canaries --all-namespaces guoxudongdeMacBook-Pro.local: Thu Jul 2 15:23:35 2020
NAMESPACE NAME STATUS WEIGHT LASTTRANSITIONTIME
test podinfo Progressing 45 2020-07-02T07:23:25Z
|
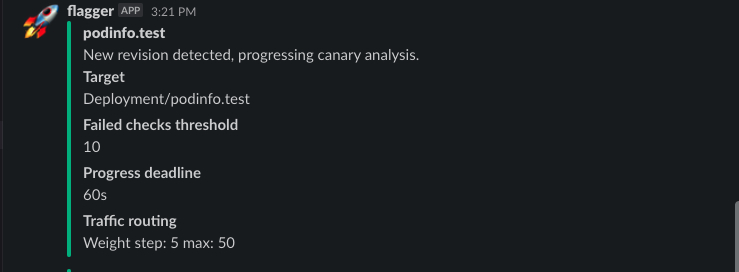
开始部署时的 Slack 通知:
页面上也能看出变化,访问到新版本的概率会越来越高,以蓝色和绿色的圆代表新版本和老版本:
发布成功后,会收到 Slack 通知:

自动回滚
当然,有自动发布就会有自动回滚,下面就通过手动触发状态码 500 异常,演示暂停发布并回滚。
部署一个新版本:
1
| $ kubectl -n test set image deployment/podinfo podinfod=stefanprodan/podinfo:3.1.2
|
触发状态码 500 异常:
1
| $ watch curl http://app.example.com/status/500
|
等待一会儿,就可以看到部署失败并回滚:
1
2
3
4
5
| $ watch kubectl get canaries --all-namespaces
Every 2.0s: kubectl get canaries --all-namespaces guoxudongdeMacBook-Pro.local: Thu Jul 2 15:45:24 2020
NAMESPACE NAME STATUS WEIGHT LASTTRANSITIONTIME
test podinfo Failed 0 2020-07-02T07:45:16Z
|
发布失败,也会收到 Slack 通知:

A/B 测试
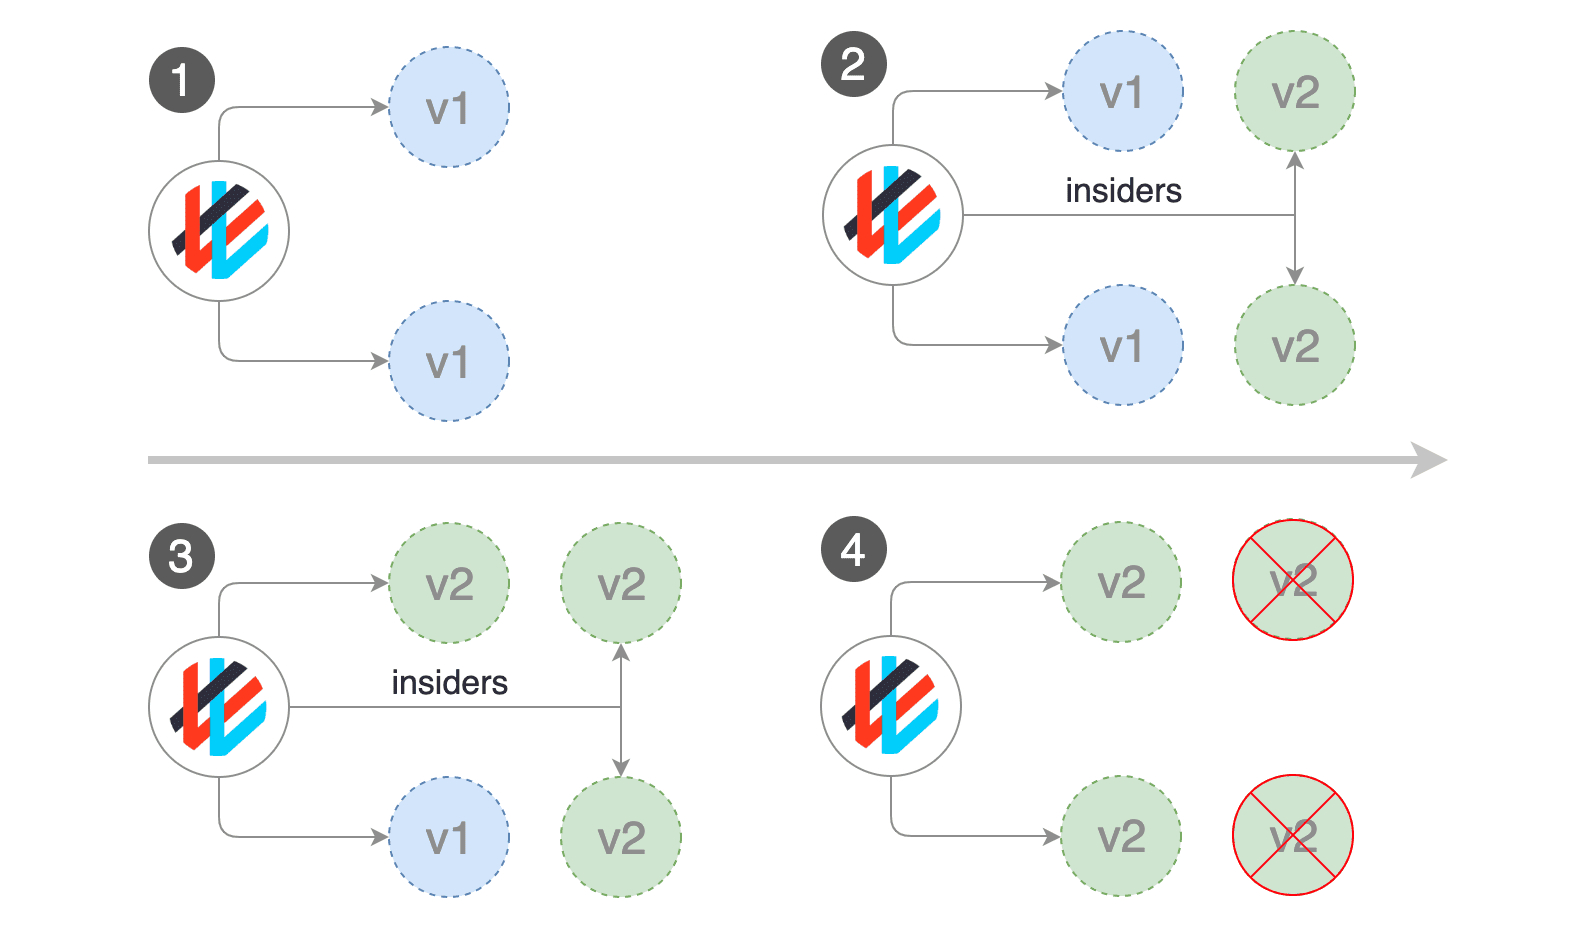
除了加权路由,Flagger 还可以根据 HTTP 匹配条件将流量路由到新版本(当然,这个 Nginx-Ingress 的功能,Flagger 只是简化了操作)。可以根据 HTTP header 和 cookie 来定位用户并细分受众,对于需要关联会话的前端应用十分有用。
修改 Canary 资源:
 1
 2
 3
 4
 5
 6
 7
 8
 9
10
11
12
13
14
15
16
17
18
19
20
21
22
23
24
25
26
27
28
29
30
31
32
33
34
35
36
37
38
39
40
41
42
43
44
45
46
47
48
49
50
51
52
53
54
| apiVersion: flagger.app/v1beta1
kind: Canary
metadata:
name: podinfo
namespace: test
spec:
provider: nginx
# deployment reference
targetRef:
apiVersion: apps/v1
kind: Deployment
name: podinfo
# ingress reference
ingressRef:
apiVersion: networking.k8s.io/v1beta1
kind: Ingress
name: podinfo
# HPA reference (optional)
autoscalerRef:
apiVersion: autoscaling/v2beta1
kind: HorizontalPodAutoscaler
name: podinfo
# the maximum time in seconds for the canary deployment
# to make progress before it is rollback (default 600s)
progressDeadlineSeconds: 60
service:
# ClusterIP port number
port: 80
# container port number or name
targetPort: 9898
analysis:
interval: 1m
threshold: 10
iterations: 10
match:
# curl -H 'X-Canary: insider' http://app.example.com
- headers:
x-canary:
exact: "insider"
# curl -b 'canary=always' http://app.example.com
- headers:
cookie:
exact: "canary"
metrics:
- name: request-success-rate
thresholdRange:
min: 99
interval: 1m
webhooks:
- name: load-test
url: http://flagger-loadtester.test/
timeout: 5s
metadata:
cmd: "hey -z 1m -q 10 -c 2 -H 'Cookie: canary=always' http://app.example.com/"
|
从上面的配置可以看到,将 headers 为 X-Canary: insider 或 cookie 为 canary=always 的请求路由到新版本。
部署一个新版本:
1
| $ kubectl -n test set image deployment/podinfo podinfod=stefanprodan/podinfo:3.1.3
|
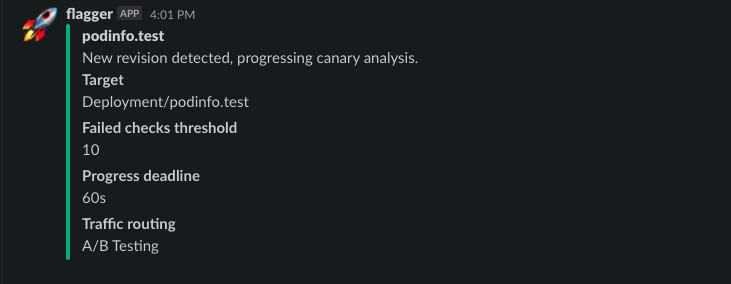
可以收到 Slack 通知:
正常访问,还是访问到老的 v3.1.1 版:
 1
 2
 3
 4
 5
 6
 7
 8
 9
10
11
12
13
14
| $ curl http://app.example.com
{
"hostname": "podinfo-primary-5dc6b76bd5-8sbh8",
"version": "3.1.1",
"revision": "7b6f11780ab1ce8c7399da32ec6966215b8e43aa",
"color": "#34577c",
"logo": "https://raw.githubusercontent.com/stefanprodan/podinfo/gh-pages/cuddle_clap.gif",
"message": "greetings from podinfo v3.1.1",
"goos": "linux",
"goarch": "amd64",
"runtime": "go1.13.1",
"num_goroutine": "11",
"num_cpu": "6"
}
|
请求添加指定 header,访问到新的 v3.1.3 版:
 1
 2
 3
 4
 5
 6
 7
 8
 9
10
11
12
13
14
| $ curl -H 'X-Canary: insider' http://app.example.com
{
"hostname": "podinfo-58bdd78d6f-m9bsc",
"version": "3.1.3",
"revision": "7b6f11780ab1ce8c7399da32ec6966215b8e43aa",
"color": "#34577c",
"logo": "https://raw.githubusercontent.com/stefanprodan/podinfo/gh-pages/cuddle_clap.gif",
"message": "greetings from podinfo v3.1.3",
"goos": "linux",
"goarch": "amd64",
"runtime": "go1.13.1",
"num_goroutine": "10",
"num_cpu": "6"
}
|
请求添加指定 cookie,访问到新的 v3.1.3 版:
 1
 2
 3
 4
 5
 6
 7
 8
 9
10
11
12
13
14
| $ curl -b 'canary=always' http://app.example.com
{
"hostname": "podinfo-58bdd78d6f-m9bsc",
"version": "3.1.3",
"revision": "7b6f11780ab1ce8c7399da32ec6966215b8e43aa",
"color": "#34577c",
"logo": "https://raw.githubusercontent.com/stefanprodan/podinfo/gh-pages/cuddle_clap.gif",
"message": "greetings from podinfo v3.1.3",
"goos": "linux",
"goarch": "amd64",
"runtime": "go1.13.1",
"num_goroutine": "10",
"num_cpu": "6"
}
|
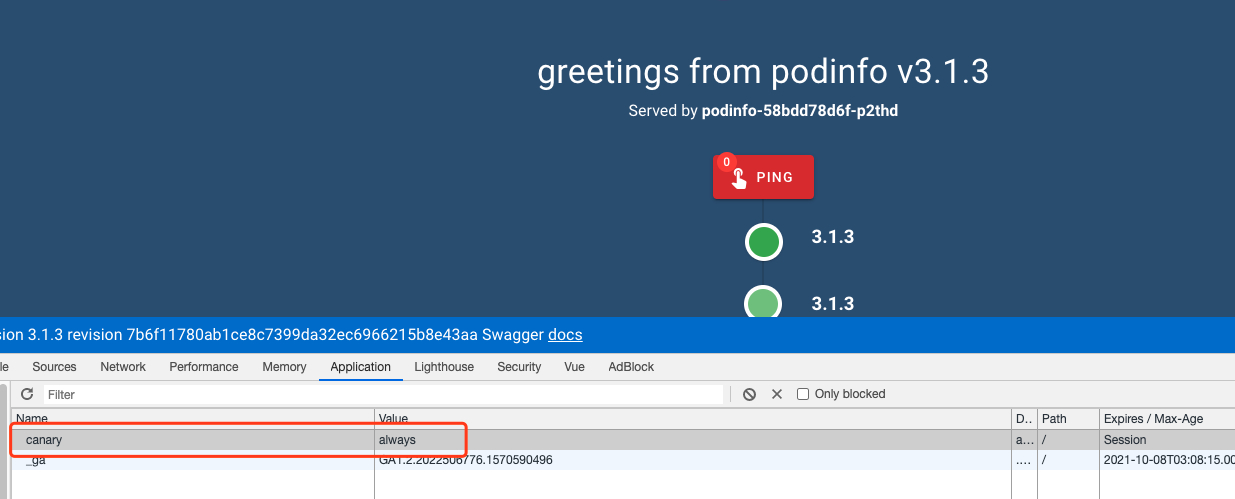
在浏览器中访问也能得到相同的结果:
结语
最早了解 Flagger 其实是因为其与 Istio 的关系,Flagger 默认的 meshProvider 就是 Istio。但是在深入了解后,发现其对市面上常见的 Service Mesh 和 Ingress Controller 都有较好的支持,通过与 Prometheus 以及负载测试器的配合可以进行细粒度的分析,从而提高了发布质量,同时还降低了人工操作出错的可能性。
最近 OAM 社区也放出了基于 Flagger 的部署 Trait 的示例,相信之后与 OAM 结合使用可以在持续部署和应用管理领域发挥更大的作用。
想了解 OAM 可以查看我之前的文章:《以应用为中心:开放应用模型(OAM)初探》。


