前言 Homebrew 标榜自己是 “macOS(或 Linux)缺失的软件包的管理器” ,使用 macOS 作为开发终端的用户,往往绕不过 brew 这个软件包管理工具。确实在 macOS 上没有比 brew 更好用的软件包管理工具了,基本上想用的 CLI 工具,只需一行命令就可一键安装,非常的方便。记得去年博主还写过一篇 《Golang 装逼指南 Ⅱ:在 Homwebrew 上发布 Golang 项目》 ,当时只是介绍了如何将 Golang 开发的 CLI 工具发布到自建的 homebrew-tap 上。本文则是讲解如何将自己开发的软件,推送到官方的 homebrew-core 仓库中,使用像 brew install kubecm 这样的命令即可完成安装。
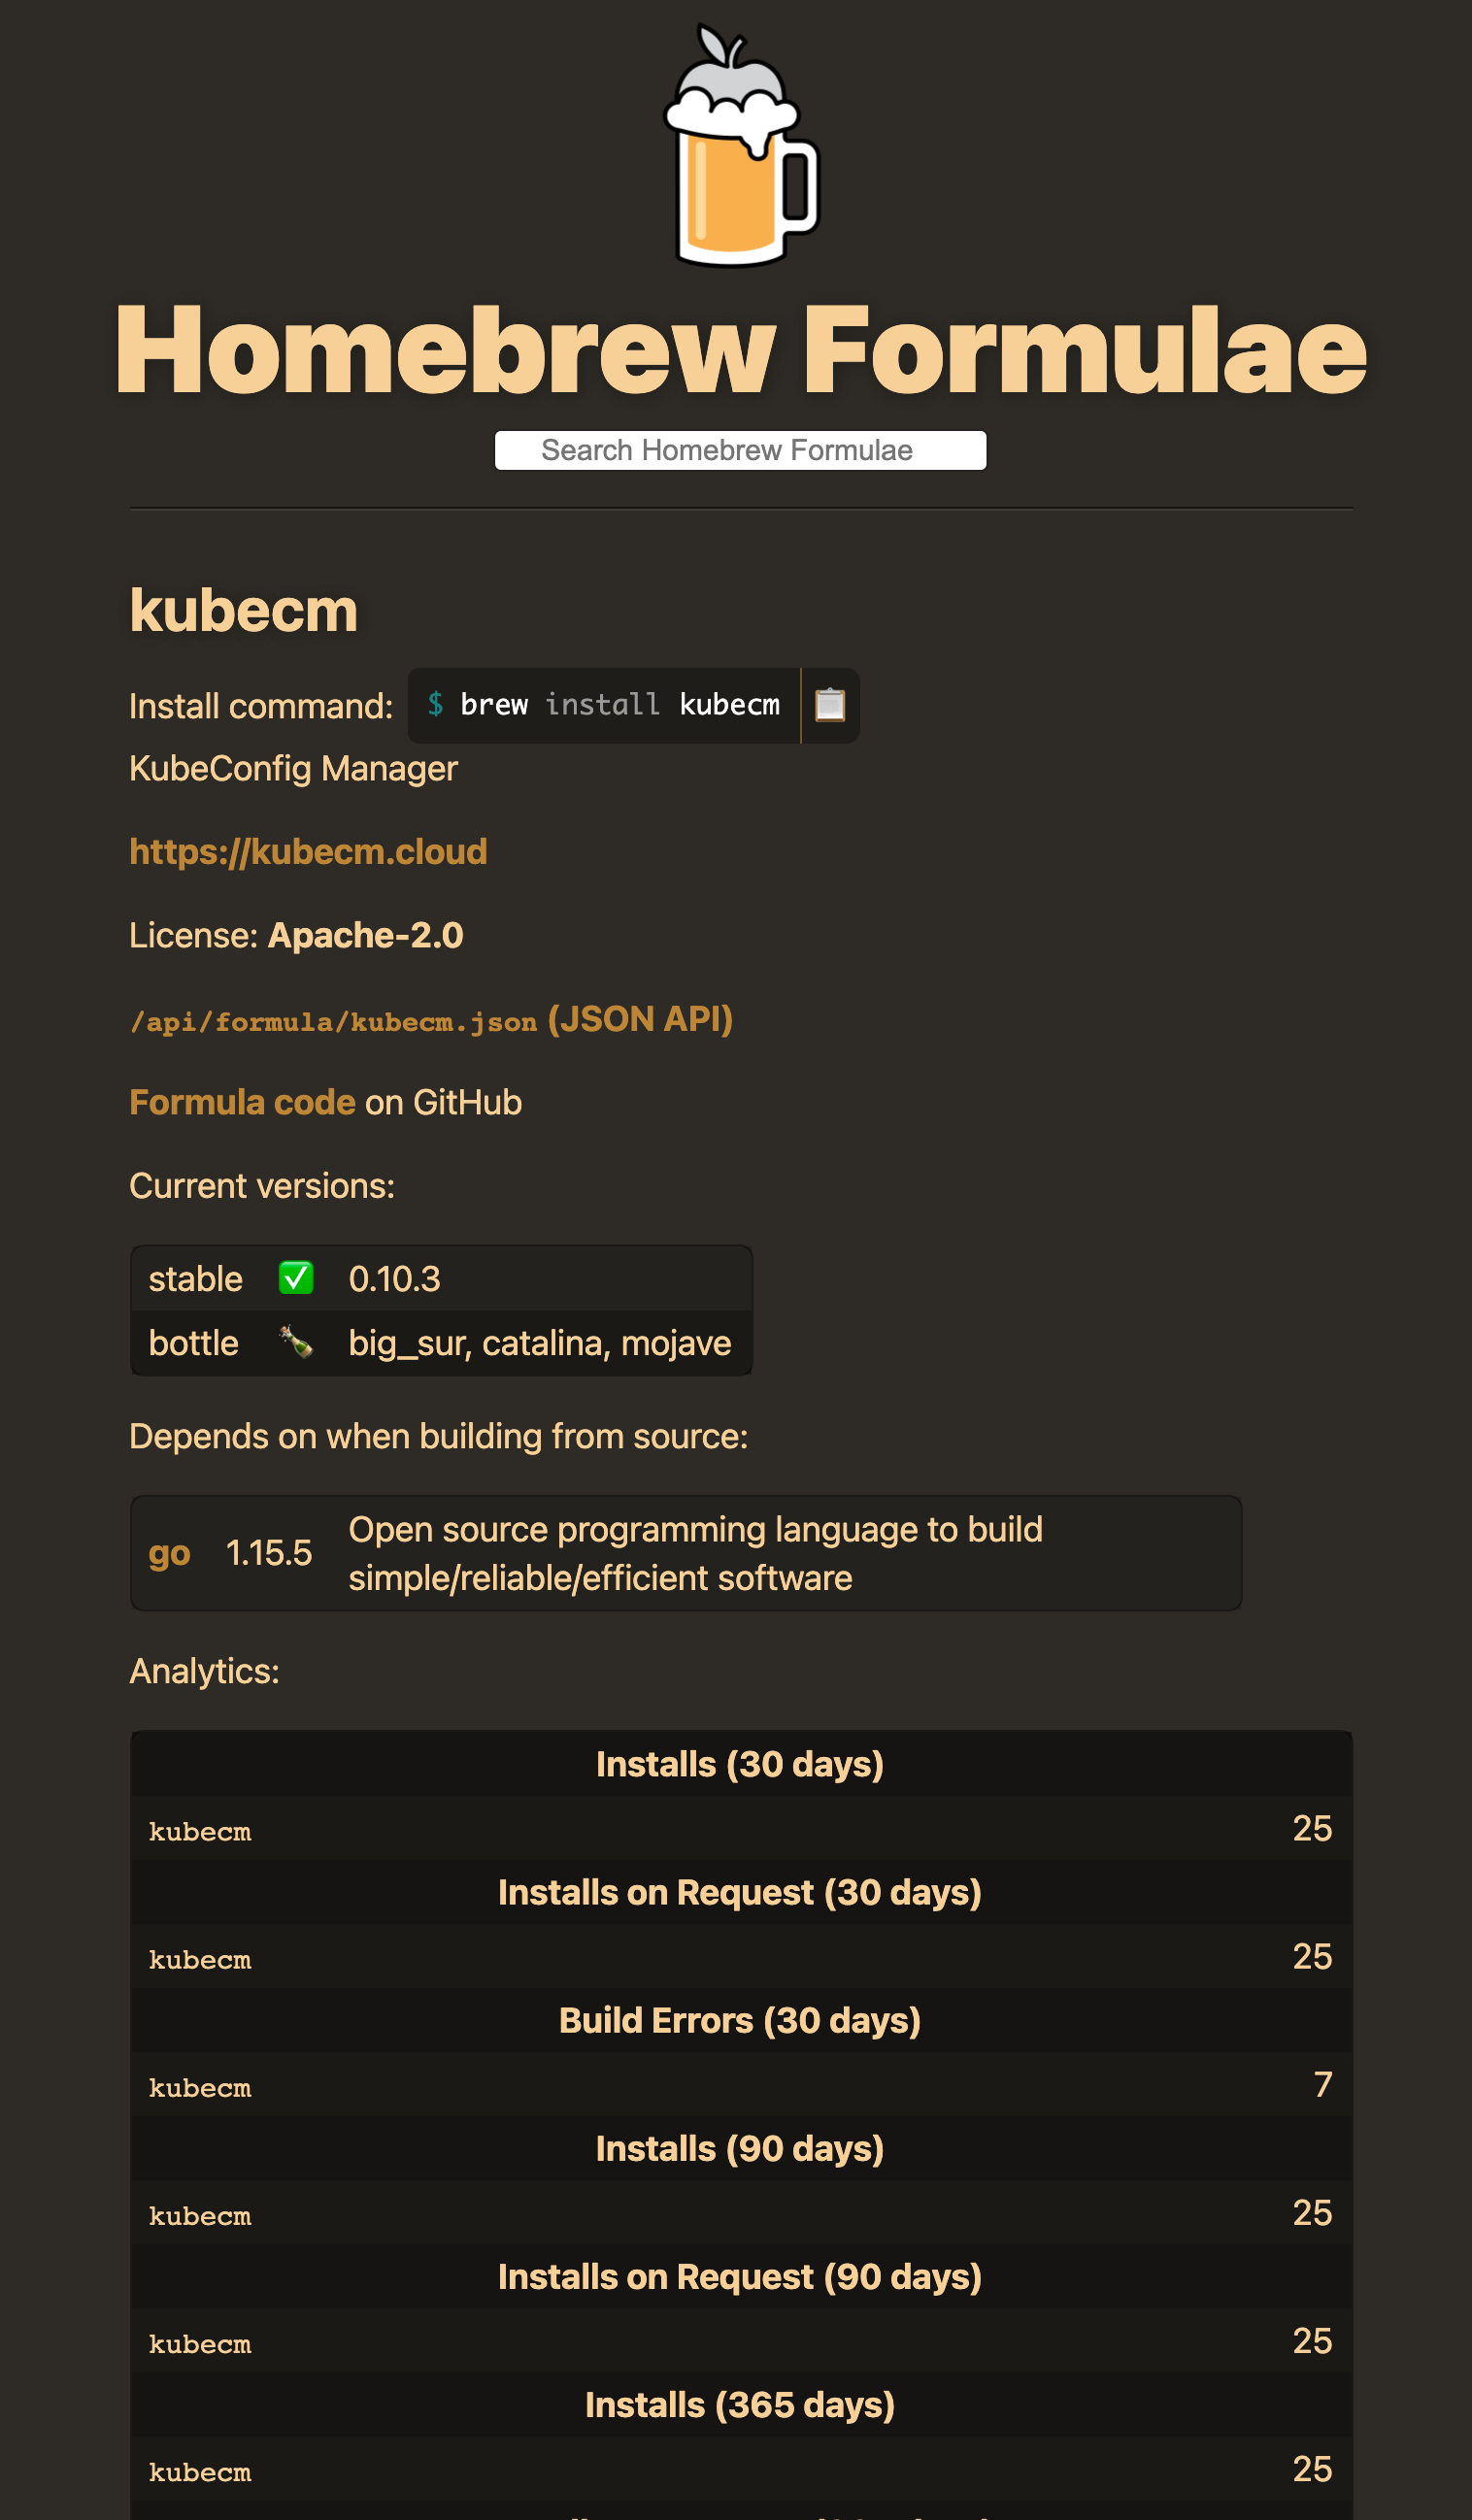
Homebrew-core homebrew-core 中存储着所有官方的安装脚本,而这些安装脚本都是由软件开发者自己提交 PR 合并到仓库中的。同时 homebrew 也提供了查询页面,用户可以在网页 Homebrew Formulae 上查询自己的软件总共被下载安装了多少次,如下:
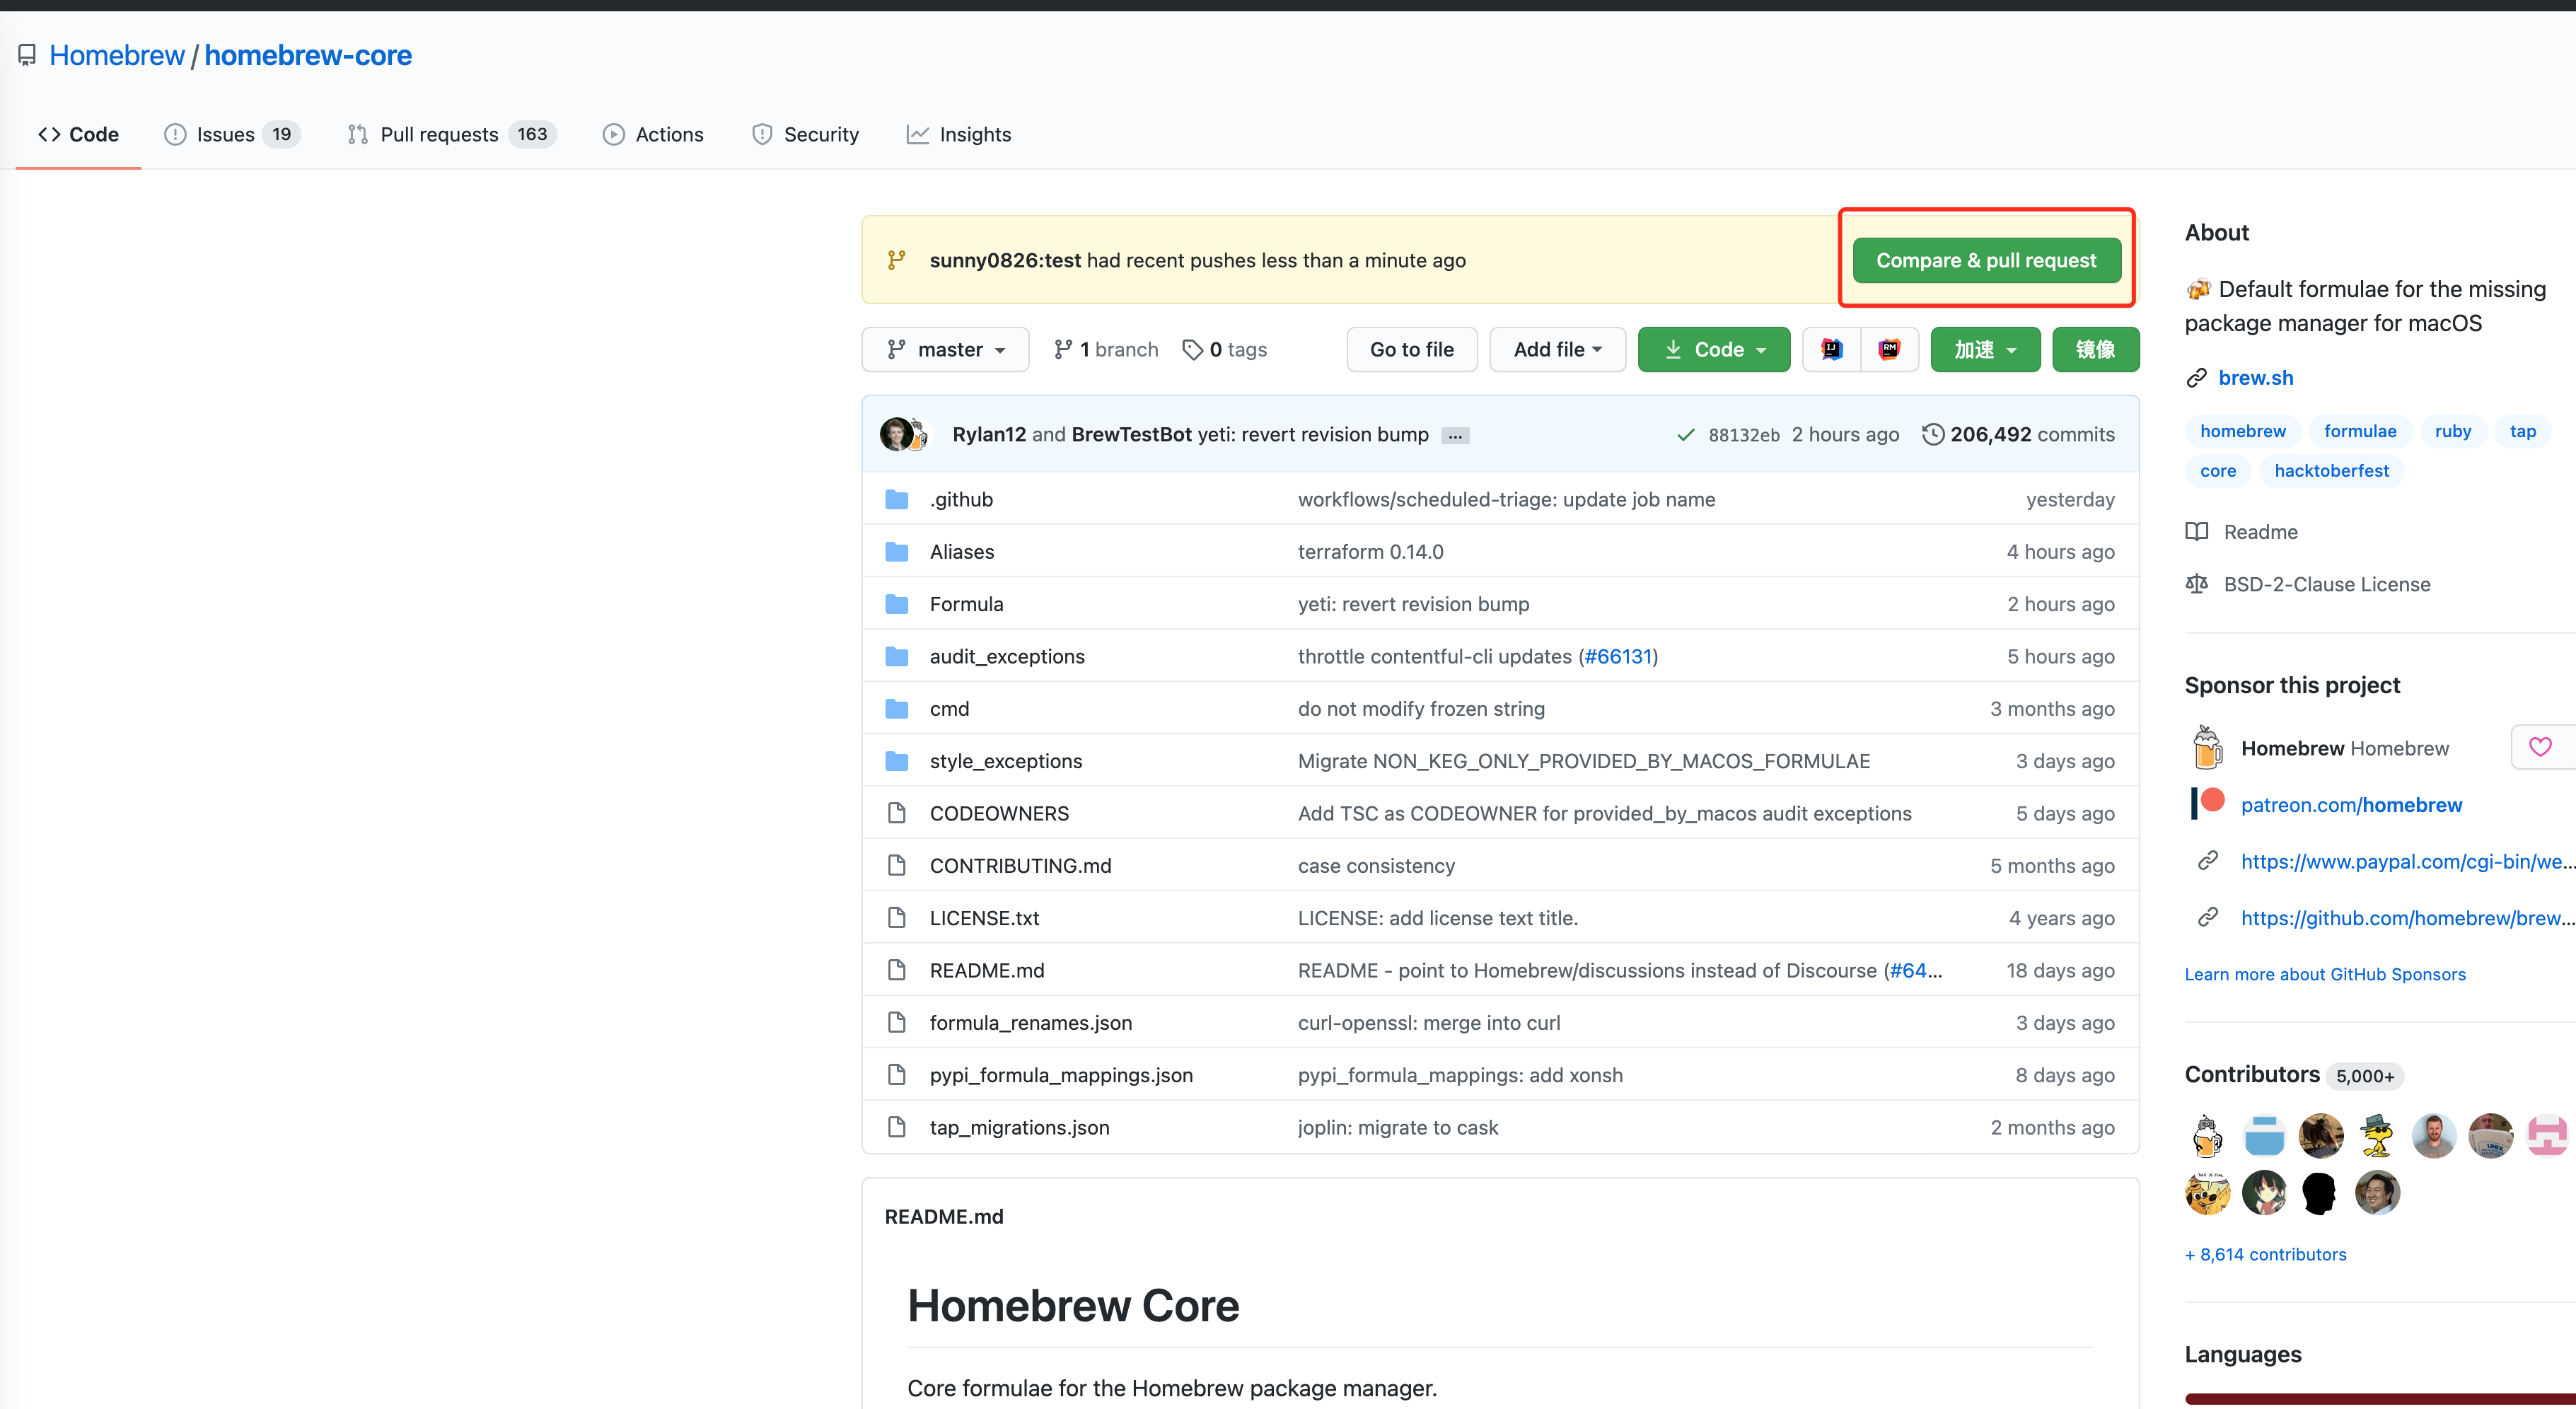
新的项目只需向这个仓库提交 PR 即可。
准备阶段 首先需要在 GitHub 上 fork homebrew-core 项目。
然后在本地找到保存 homebrew-core 的目录:
1
$ cd $( brew --repository homebrew/core)
新增 remote 地址为 fork 仓库的地址:
1
$ git remote add <YOUR_USERNAME> https://github.com/<YOUR_USERNAME>/homebrew-core.git
这里的 YOUR_USERNAME 是 GitHub username。
新建分支 这里的操作就和向开源项目提交 PR 一样,新建 branch 并创建安装脚本。
更新 master 分支
从最新的 master 分支创建新 branch
1
$ git checkout -b <YOUR_BRANCH_NAME> origin/master
编写脚本 首先需要使用 brew search <formula> 来查看上游仓库中是否有同名的项目,同时确保你的项目是稳定版且带有 tag(不能只是一个 GitHub repo)。
使用 brew create 创建一个脚本模板,命令如下:
1
$ brew create https://example.com/foo-0.1.tar.gz
这里的 URL 地址,就是 GitHub Release 页面的 Source code(tar.gz) 的 URL 地址。
打开 Formula/foo.rb 可以看到:
 1
 2
 3
 4
 5
 6
 7
 8
 9
10
11
12
13
14
15
16
17
18
19
20
21
22
23
class Foo < Formula
desc ""
homepage ""
url "https://example.com/foo-0.1.tar.gz"
sha256 "85cc828a96735bdafcf29eb6291ca91bac846579bcef7308536e0c875d6c81d7"
license ""
# depends_on "cmake" => :build
def install
# ENV.deparallelize
system "./configure" , "--disable-debug" ,
"--disable-dependency-tracking" ,
"--disable-silent-rules" ,
"--prefix= #{ prefix} "
# system "cmake", ".", *std_cmake_args
system "make" , "install"
end
test do
system "false"
end
end
之后就是完善这个脚本,desc、homepage、license 都请根据项目情况填写。
如果是 Golang 项目,则需要添加 Go 依赖 depends_on "go" => :build,同时在 install 中完善安装脚本,golang 开发的项目一般都是使用 go build 来构建。
Info
这里附上一份 kind 的脚本供大家参考:
 1
 2
 3
 4
 5
 6
 7
 8
 9
10
11
12
13
14
15
16
17
18
19
20
21
22
23
24
25
26
27
28
29
30
31
32
33
34
35
36
37
38
39
40
41
42
class Kind < Formula
desc "Run local Kubernetes cluster in Docker"
homepage "https://kind.sigs.k8s.io/"
url "https://github.com/kubernetes-sigs/kind/archive/v0.9.0.tar.gz"
sha256 "c154289659a7ef30b301a0787ecfa2e08edaada6059bf5acefe9f3be1e026381"
license "Apache-2.0"
head "https://github.com/kubernetes-sigs/kind.git"
bottle do
cellar :any_skip_relocation
rebuild 1
sha256 "e40a2343bf999585fa4fcb1a1e9b801427e921c098fc3f7e3026c071a0e72520" => :big_sur
sha256 "e5ba99b5f14711e0dcb121a992d74c5ee6c6b0468b27e5200bf796d4987e13c0" => :catalina
sha256 "d52a780ad6af93a2a7c480a41c5178a461b9966ddc1adb66adde8ff3bce15238" => :mojave
sha256 "423ea750ae8589d1a199847f746d8e9b5b1f1d81ceff3a9dab2d63f161532588" => :high_sierra
end
depends_on "go" => :build
def install
system "go" , "build" , "-o" , bin/ "kind"
prefix. install_metafiles
# Install bash completion
output = Utils . safe_popen_read(" #{ bin} /kind" , "completion" , "bash" )
(bash_completion/ "kind" ). write output
# Install zsh completion
output = Utils . safe_popen_read(" #{ bin} /kind" , "completion" , "zsh" )
(zsh_completion/ "_kind" ). write output
# Install fish completion
output = Utils . safe_popen_read(" #{ bin} /kind" , "completion" , "fish" )
(fish_completion/ "kind.fish" ). write output
end
test do
# Should error out as creating a kind cluster requires root
status_output = shell_output(" #{ bin} /kind get kubeconfig --name homebrew 2>&1" , 1 )
assert_match "failed to list clusters" , status_output
end
end
更多内容见官方文档 。
检测脚本 在脚本完成后,请先进行如下测试,确保测试通过且无任何报错。
1
2
3
4
$ brew tests
$ brew install --build-from-source <CHANGED_FORMULA>
$ brew test <CHANGED_FORMULA>
$ brew audit --strict <CHANGED_FORMULA>
提交代码 在通过所有测试后,就可以提交代码了,需要对每个更改单独提交 PR,且 commit 有格式要求,一般为 <FORMULA_NAME> <NEW_VERSION> 如 kbecm 0.10.3。
1
2
3
$ git add Formula/foo.rb
$ git commit -m 'foo 0.0.1'
$ git push --set-upstream <YOUR_USERNAME> <YOUR_BRANCH_NAME>
在这里提交后,代码就会 push 到之前 fork 的 homebrew/core 项目。
提交 PR 之后就可以在 GitHub 页面操作提交 PR 了。项目维护者的响应还是很及时的,在 PR 通过所有 CI test 后,就会有维护者进行 review 并指出需要修改的地方,根据要求修复即可。
提交新版本 PR 合并成功后,如果要发布新版本,这里推荐两种方式提交新版本。
CLI brew 提供了十分简单的方式自动创建 PR,命令如下:
1
$ brew bump-formula-pr --url https://example.com/foo-0.1.tar.gz
更多的信息可以通过 brew bump-formula-pr --help 查看。
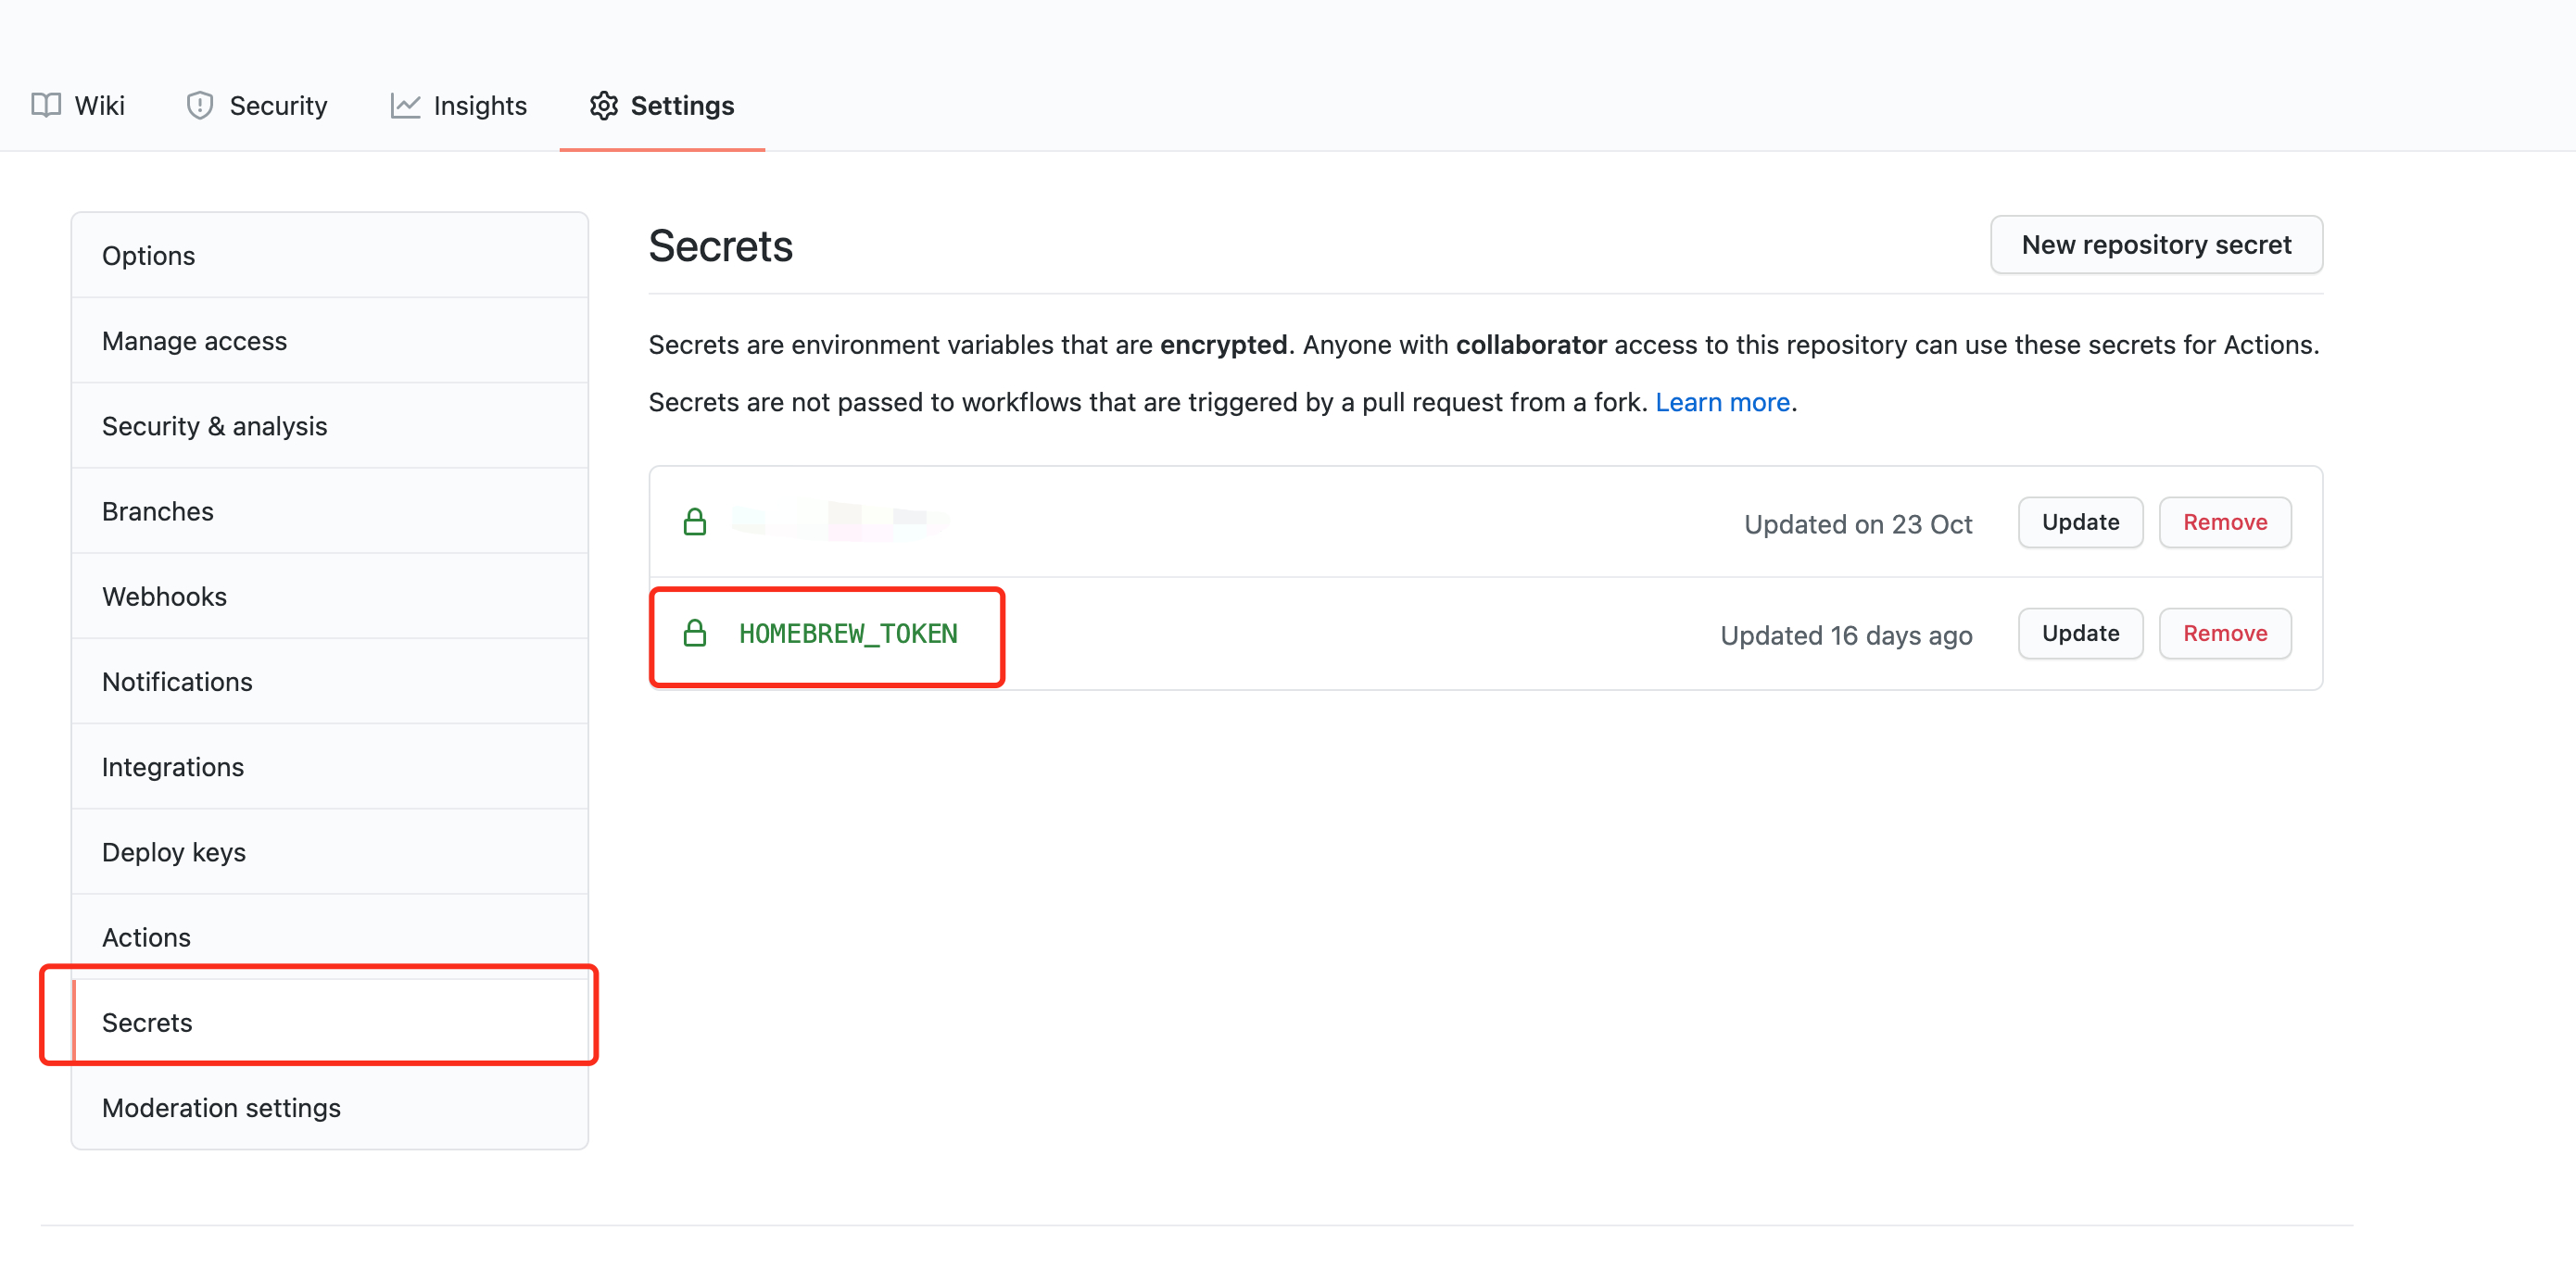
GitHub action 这一步也可以在 GitHub action 中自动完成,使用 homebrew-bump-formula 插件。原理其实也是使用了 brew bump-formula-pr,但是这样就无需手动触发,可以集成到 Release 的 CI 中。
 1
 2
 3
 4
 5
 6
 7
 8
 9
10
11
12
13
14
15
16
17
18
19
20
21
22
23
24
25
26
name : Bump Homebrew kubecm formula
on :
push :
tags : 'v*'
jobs :
homebrew :
runs-on : ubuntu-latest
steps :
- name : Update Homebrew formula
uses : dawidd6/action-homebrew-bump-formula@v3
with :
# GitHub token, required, not the default one
token : ${{secrets.TOKEN}}
# Optional, defaults to homebrew/core
tap : USER/REPO
# Formula name, required
formula : FORMULA
# Optional, will be determined automatically
tag : ${{github.ref}}
# Optional, will be determined automatically
revision : ${{github.sha}}
# Optional, if don't want to check for already open PRs
force : false # true
结语 总的来说,这一套流程都比较简单,笔者也只是在 GitHub action 的 TOKEN 上浪费了一些时间。使用 brew 不但简化了安装步骤,提升了用户体验,还可以把诸如 completion 命令生成的自动补全脚本在安装时就注入到系统中,无需在装好后再进行其他操作,体验极佳。