前言
经过上篇文章,我们已经可以在 GitHub 上构建一个看上去正经的 Golang 项目了,但这并不是结束。一个真正的用 Golang 构建的可执行文件是可以在全平台运行的,前文中我们使用 goreleaser 发布了一个非常漂亮的 release 页面,并在 release 页面上提供多平台的可执行文件下载。但是如果只是拿着可执行文件到处拷贝执行,总归不够优雅,所以这里就介绍如何在 Homebrew 上发布自己的 Golang 应用,如何像各种牛逼的项目那样使用 brew 一键安装自己的项目。
Homebrew
对于使用 macOS 的用户来说,Homebrew 一点也不陌生,它类似于 CentOS 的 yum 和 Ubuntu 的 apt-get 。
Homebrew 是最初由 Max Howell 用 Ruby 写的 OS X 软件管理系统,其代码开源在 GitHub 上。
Homebrew 给自己贴了个一句话简介:The missing package manager for OS X。翻译过来成中文就是:macOS 缺失的软件包的管理器。名副其实地是,Homebrew 真的很好用。安装、升级、卸载等操作,在 Homebrew 的生态下,都只需要一条命令就可以了。并且 Homebrew 会自动为你解决软件包的依赖问题。
发布步骤
- 创建 Formula
- 修改 rb 脚本
- 本地测试
- 创建 Tap
- 实际安装
创建 Formula
首先进入 release 页面,拷贝 macOS 的 Darwin 包地址
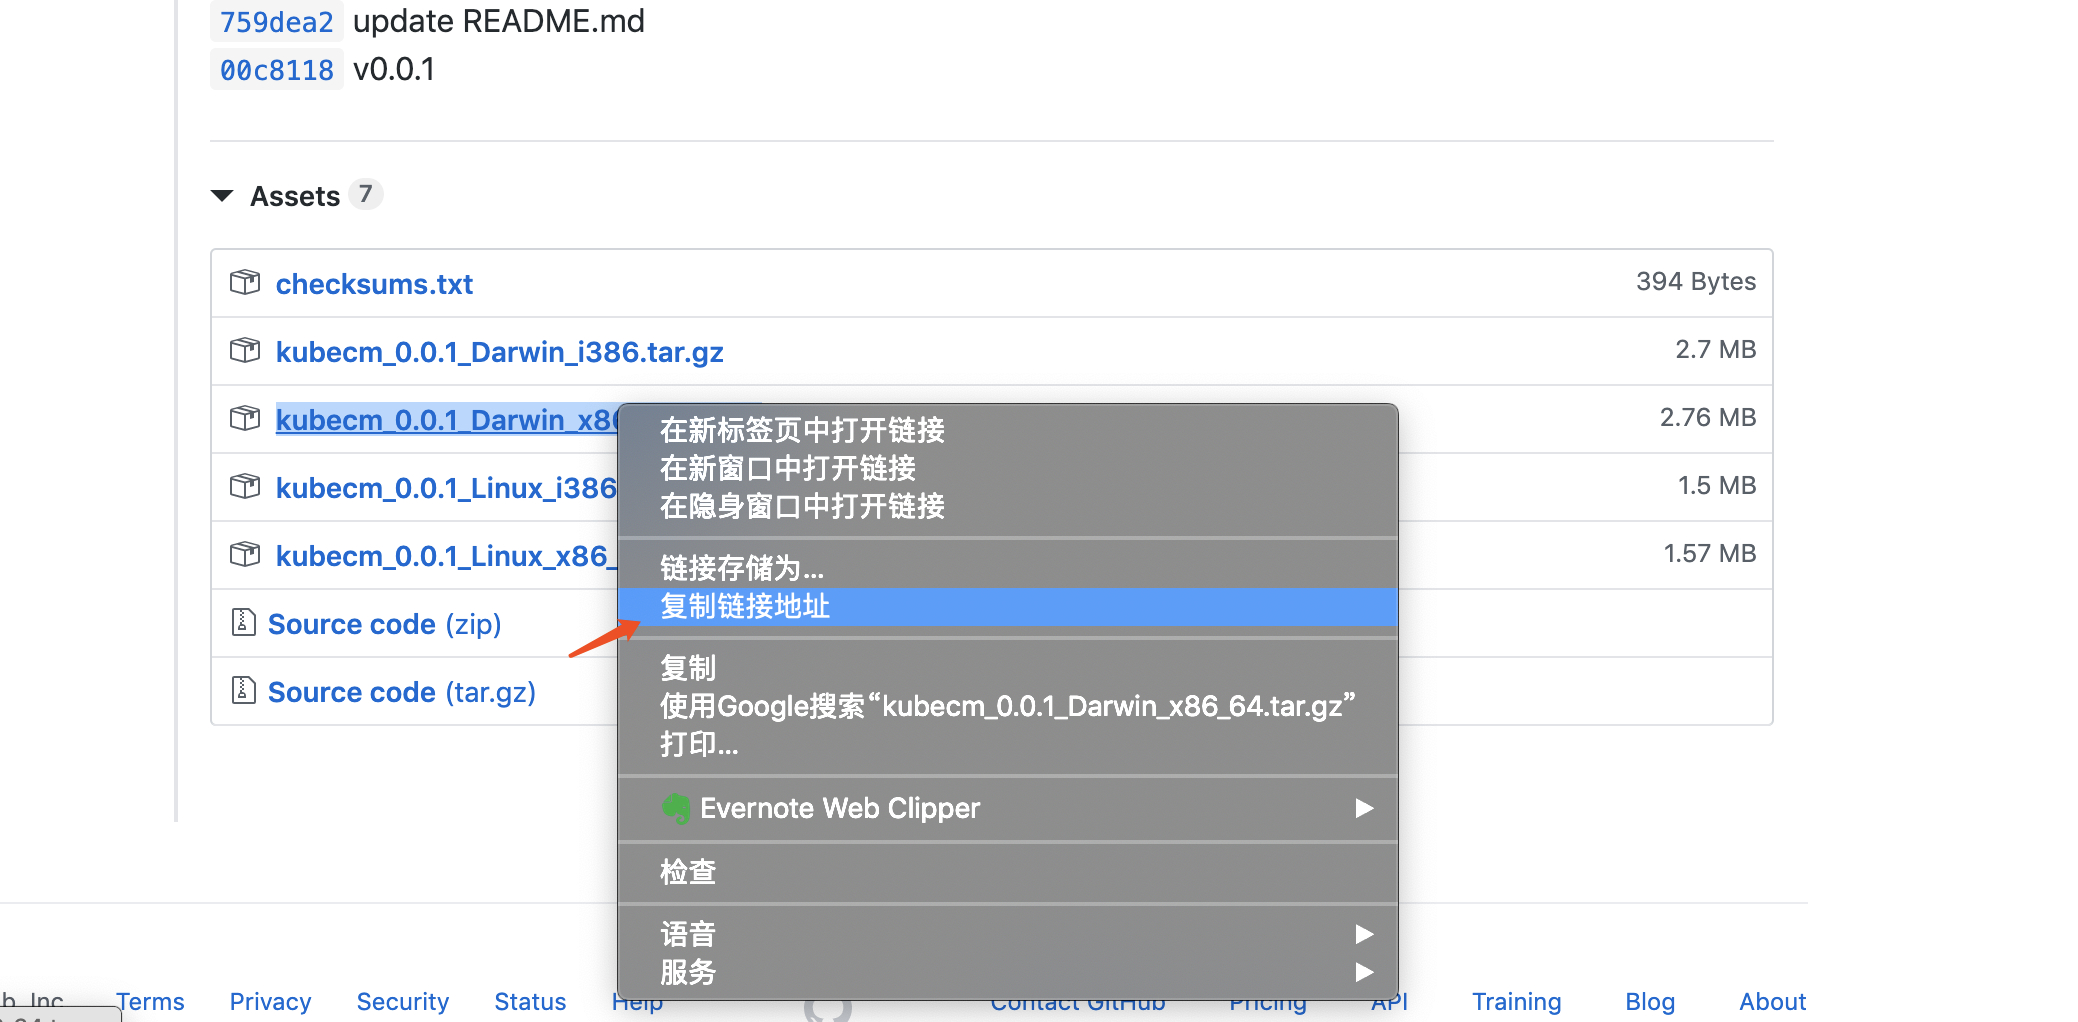
然后通过命令在本地创建 Formula
brew create https://github.com/sunny0826/kubecm/releases/download/v0.0.1/kubecm_0.0.1_Darwin_x86_64.tar.gz
通过这个命令,brew 会创建一个名为 kubecm.rb 的文件在 /usr/local/Homebrew/Library/Taps/homebrew/homebrew-core/Formula/ 目录。
修改 rb 脚本
然后在该目录可以看到 kubecm.rb 这个脚本:
# Documentation: https://github.com/Homebrew/brew/blob/master/share/doc/homebrew/Formula-Cookbook.md
#                http://www.rubydoc.info/github/Homebrew/brew/master/Formula
# PLEASE REMOVE ALL GENERATED COMMENTS BEFORE SUBMITTING YOUR PULL REQUEST!

class OtfccMac64 < Formula
  desc ""
  homepage ""
  url "https://github.com/sunny0826/kubecm/releases/download/v0.0.1/kubecm_0.0.1_Darwin_x86_64.tar.gz"
  version "0.0.1"
  sha256 "f393b14f9c42c890b8a60949b13a8f9b5c3f814daa8b18901656ccc3b866f646"

  # depends_on "cmake" => :build
  depends_on :x11 # if your formula requires any X11/XQuartz components

  def install
    # ENV.deparallelize  # if your formula fails when building in parallel

    # Remove unrecognized options if warned by configure
    system "./configure", "--disable-debug",
                          "--disable-dependency-tracking",
                          "--disable-silent-rules",
                          "--prefix=#{prefix}"
    # system "cmake", ".", *std_cmake_args
    system "make", "install" # if this fails, try separate make/make install steps
  end

  test do
    # `test do` will create, run in and delete a temporary directory.
    #
    # This test will fail and we won't accept that! It's enough to just replace
    # "false" with the main program this formula installs, but it'd be nice if you
    # were more thorough. Run the test with `brew test otfcc-win32`. Options passed
    # to `brew install` such as `--HEAD` also need to be provided to `brew test`.
    #
    # The installed folder is not in the path, so use the entire path to any
    # executables being tested: `system "#{bin}/program", "do", "something"`.
    system "false"
  end
end
默认提供的脚本并不适合我们,修改这个脚本:
class Kubecm < Formula
  desc "Merge multiple kubeconfig"
  homepage "https://github.com/sunny0826/kubecm"
  url "https://github.com/sunny0826/kubecm/releases/download/v0.0.1/kubecm_0.0.1_Darwin_x86_64.tar.gz"
  version "0.0.1"
  sha256 "8c2766e7720049ba0ce9e3d20b7511796a6ba224ce1386cd1d4ef8cc6e1315cd"
  # depends_on "cmake" => :build

  def install
    bin.install "kubecm"
  end
end
分布填上 desc 、 homepage 、url 等信息,由于这里下载的是 darwin 包,所以直接在 install 中填上 bin.install "kubecm" 即可。
本地测试
保存脚本,然后使用 brew install kubecm 进行测试,查看结果:
Updating Homebrew...
Fast-forwarded master to origin/master.
Fast-forwarded master to origin/master.
==> Auto-updated Homebrew!
Updated 2 taps (sunny0826/tap, homebrew/cask).
==> Updated Formulae
sunny0826/tap/kubecm

==> Downloading https://github.com/sunny0826/kubecm/releases/download/v0.0.1/kubecm_0.0.1_Darwin_x86_64.tar.gz
Already downloaded: /Users/guoxudong/Library/Caches/Homebrew/kubecm-86.64.tar.gz
🍺  /usr/local/Cellar/kubecm/86.64: 5 files, 5.4MB, built in 1 second
可以看到已经安装成功了!
创建 Tap
在本地测试成功之后,就可以把他发布了。这里需要在 GitHub 上创建一个名为 homebrew-tap 的 repo 注意该 repo 需要以 homebrew- 为前缀,像是这样。
然后将刚才的 kubecm.rb 脚本上传到这个 repo ,然后就可以通过 brew 的方式安装了。
实际测试
发布好之后,就可以测试发布成功没有了。
首先卸载之前使用本地脚本安装的应用:
$ brew uninstall kubecm
Uninstalling /usr/local/Cellar/kubecm/86.64... (5 files, 5.4MB)
然后使用
brew tap sunny0826/tap && brew install kubecm
或者
brew install sunny0826/tap/kubecm
来进行安装。
结语
到这我们就成功的在 Homebrew 上发布了自己的 Golang 应用,本篇中的方法仅适合 Golang 开发的二进制可执行文件的发布,其他语言的发布需要在 .rb 脚本上有所修改,更多内容请参考官方文档。这里要再介绍一下我用 Golang 开发的另一个小工具 kubecm ,该项目之前我是使用 python 开发的,用于合并多个 kubeconfig 文件,本次重写新增了查看所有 kubeconfig 和 删除 kubeconfig 中 context 等功能,同时也在 Homebrew 上发布,欢迎拍砖。